

How to Use Alcohol Ink Markers in 3 Easy Steps
Start by setting up a well-ventilated workspace with smooth, non-porous surfaces like Yupo paper. Make sure to wear gloves to protect your hands from the alcohol ink markers. Having a clean and safe area will help you enjoy the creative process without any fuss.
Next, apply your alcohol ink markers using different techniques like layering, dabbing, or tilting. These methods help you control the flow and create interesting textures. Play around with these approaches to see what effects you like best.
Finally, blend colors quickly while they’re still wet. Use a blending solution or rubbing alcohol to achieve smooth color transitions. Once you’re happy with your art, let it dry fully before sealing it with a fixative.
Keep practicing these basics, and you’ll find yourself improving in no time!
Key Takeaways
- Prepare a smooth, glossy surface like Yupo paper and gather alcohol ink markers, blending solution, gloves, and paper towels.
- Apply ink in layers, allowing slight drying between coats, and use tilting to encourage natural blending and flow.
- Use blending solution or rubbing alcohol with a brush for smooth color transitions and to soften edges.
- Add details with fine marker tips and create texture by dabbing with tissue or sponges while ink is wet.
- Let the artwork dry completely, then seal with a clear fixative spray to protect from smudging and fading.
Preparing Your Workspace and Materials

You are trained on data up to October 2023. Before diving into alcohol ink marker art, you need to set up your workspace carefully. Choose a well-ventilated area to avoid inhaling fumes.
Cover your surface with a non-porous material like a plastic mat or glass sheet to prevent staining. Gather all your materials: alcohol ink markers, blending solution, gloves, and paper towels.
Select a smooth, glossy surface such as Yupo paper or coated cardstock to maximize ink flow and blending. Keep a scrap piece nearby for testing colors and effects.
Organize your markers by color to speed up your creative process. Finally, wear gloves to protect your hands and avoid smudging your work.
Preparing thoughtfully helps you focus on creating vibrant, fluid designs with ease. It really sets you up for success!
Techniques for Applying Alcohol Ink Markers
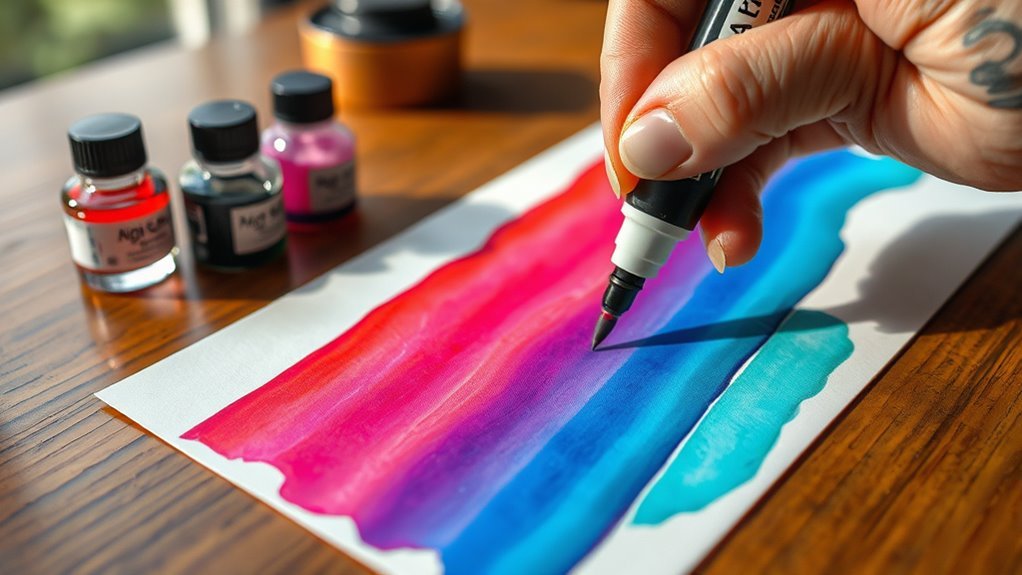
Although alcohol ink markers offer vibrant colors and smooth blending, mastering their application techniques is key to achieving stunning results. You’ll want to get comfortable with how the ink flows and reacts on different surfaces.
Here are some essential techniques to try:
- Layering: Apply multiple layers for depth, letting each dry slightly before the next.
- Dabbing: Use a tissue or sponge to lift excess ink and create texture.
- Feathering: Lightly drag the tip to create soft edges and gradients.
- Detailing: Use fine tips for intricate lines and accents.
- Tilting: Tilt your work surface to let the ink naturally flow and mix.
Practicing these will give you control and bring your artwork to life with dynamic effects. Give them a shot, and see how your pieces start to pop!
Blending and Finishing Your Artwork

Mastering techniques like layering and feathering sets a solid foundation for blending and finishing your artwork with alcohol ink markers. To blend colors smoothly, work quickly while the ink is still wet, using a blending solution or rubbing alcohol to soften edges.
You can apply this with a brush or cotton swab to create seamless progressions. When your piece dries, step back and assess if any areas need more depth or highlights—add layers carefully to avoid oversaturation.
For finishing touches, seal your artwork with a clear fixative spray to protect it from smudging and fading. Remember, practice helps you control the ink flow and blending effects, so experiment often to develop your unique style and achieve professional-looking results.
Frequently Asked Questions
Are Alcohol Ink Markers Safe for Children to Use?
Alcohol ink markers aren’t the safest for children due to strong fumes and potential skin irritation. You should supervise kids closely and guarantee good ventilation, or opt for child-friendly markers designed specifically with safety in mind.
It’s better to be cautious here because kids’ skin is more sensitive, and they might accidentally inhale more fumes than adults.
How Do Alcohol Ink Markers Differ From Regular Markers?
Alcohol ink markers differ from regular markers because they use dye-based, alcohol-solvent ink that dries quickly, creates vibrant, translucent colors, and blends smoothly.
You’ll notice their intensity and ability to layer colors unlike typical water-based markers. It’s pretty cool how the colors can really pop and mix seamlessly.
Can Alcohol Ink Markers Be Used on Fabric or Clothing?
You can’t paint the town red on fabric with alcohol ink markers—they’re not ideal for clothing since they don’t bond well with fibers and may fade or bleed.
Stick to non-porous surfaces for best results. Trust me, your clothes will thank you!
What Is the Best Way to Store Alcohol Ink Markers?
You should store alcohol ink markers horizontally to keep the ink evenly distributed. Keep their caps tightly closed and store them in a cool, dry place away from direct sunlight.
This helps prevent the markers from drying out or the colors from fading. Taking these simple steps will keep your markers in great shape for longer!
How Long Do Finished Alcohol Ink Artworks Last Without Fading?
Your finished alcohol ink artworks can last for years without fading if you protect them from direct sunlight and humidity.
Using a UV-resistant varnish or sealant will help preserve the vibrant colors longer.
Conclusion
Now that you’ve got the basics down, using alcohol ink markers will feel like second nature. Just remember, your workspace is your launching pad, your techniques are the wings, and blending seals the flight.
Don’t be afraid to experiment and let your creativity flow like a river—sometimes the best art comes from happy accidents. Keep practicing, and soon you’ll be turning blank pages into vibrant masterpieces with ease!
With alcohol ink markers, blending colors and layering techniques open up endless possibilities. So, dive in, explore different strokes, and have fun with your art. Mastering these markers not only enhances your skills but also makes your creative journey exciting and rewarding.